
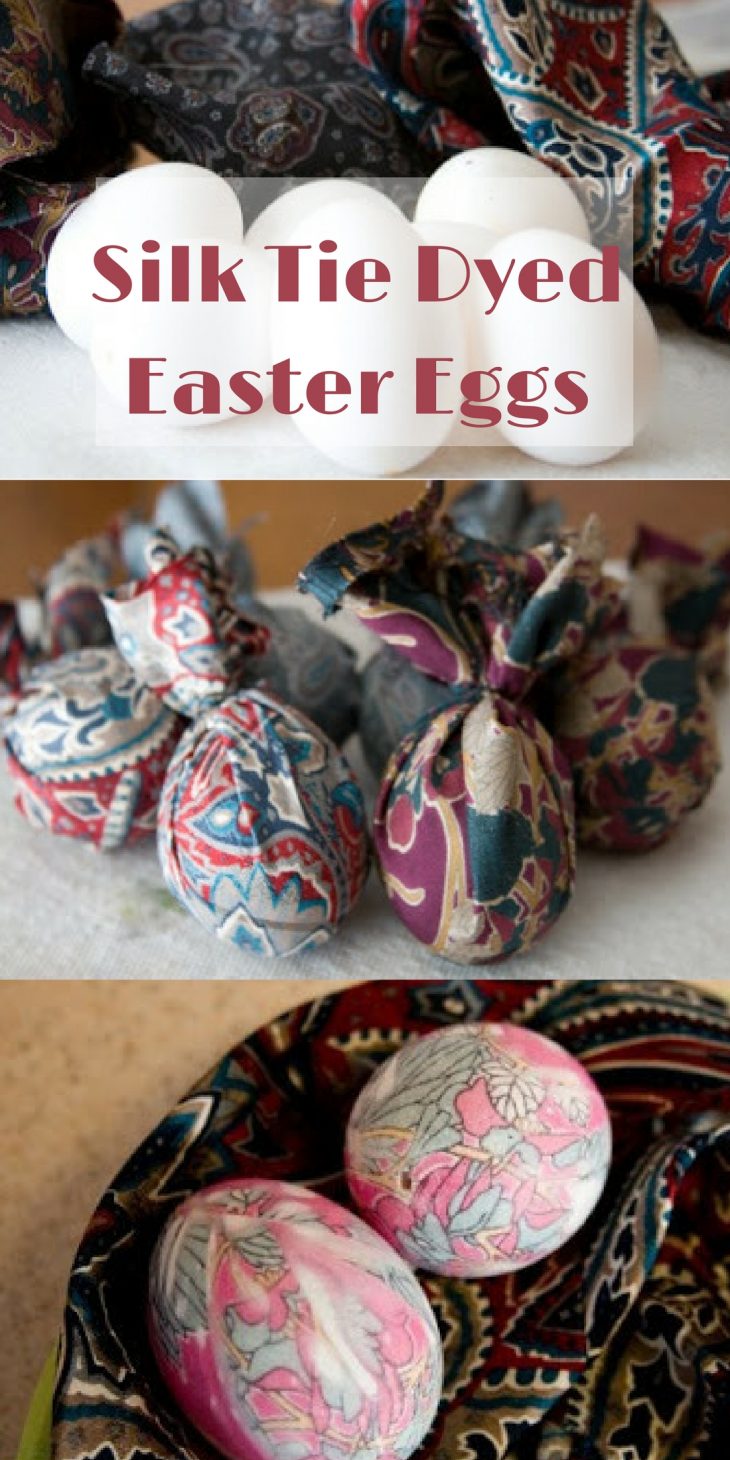
Silk Tie Dyed Eggs
This post and its photos may contain affiliate links, view our disclosure policy.
These silk tie dyed eggs are a bit of work to make but they turn out so pretty. Plus, this offers up something a bit more unique than the traditional dyed Easter eggs.
SILK TIE DYED EGGS
How To Blow Out An Egg
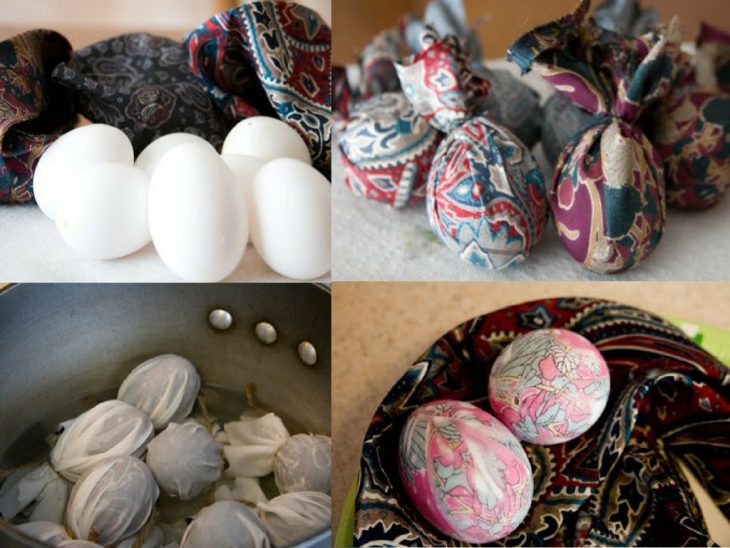
Before you begin the egg dying process you’ll want to blow out the eggs.
You’ll need a straight pin or safety pin, a toothpick and a short straw.
While your eggs are still sitting in the carton take the pin and carefully tap the sharp end through the end of the egg. Push the pin in as far as it will go to widen the hole just a bit.
Now flip the egg over and do the exact same thing on the other end. You can use the toothpick to gently, very, very gently, make the hole a bit bigger and also break up the egg.
Breaking up the egg will make it easier to blow out.
Holding the egg over a dish, place the straw over a hole and gently blow air into the egg pushing the contents out through the opposite hole. This can take a minute so be patient.
After all the egg is removed gently run water through the egg to clean it out.
How To Silk Tie Dye Easter Eggs
Note, I went to the thrift store and purchased the ties for this project.

The ties had the seams ripped out and the lining removed and then cut into small sections.
Each egg is then wrapped in the tie and then in a piece of old sheet or pillow case.
We secured the top of the tie with small rubber bands and the top of the old sheet with jute rope.


It probably doesn’t have to be 2 person operations, but it just made it easier since the blown out eggs are a bit fragile.


After they are all wrapped up put them in a large pan.

If you have blown the eggs out they will want to float to the top, so I added a colander to the pan to hold them down. Be sure to add a 1/4 cup of white vinegar to the water.

Bring the eggs to a boil and then simmer for 20-25 minutes. I’m not sure if they have to simmer this long if the eggs are blown out, but I did just to be safe. Remove from the pan and let cool completely before unwrapping.

Here’s how our eggs looked when they were done. I’m pretty happy with the end results for our first attempt.
Some things to take into consideration.
When wrapping the egg in the silk tie try to have the tie touching the egg without any folds…otherwise you get these goofy white lines.

Also, make sure the ties are 100% silk and that you double check the label. If they are not 100% silk no color transfer will occur leaving you with a plain white egg. You can rub a bit of vegetable oil on your eggs to make them shiny.
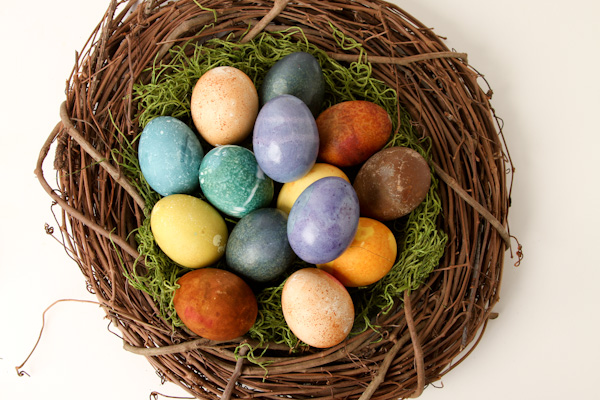
Want another fun way to color Easter eggs? Check out these Natural Dyed Easter Eggs!
***PIN SILK TIE DYED EGGS***


These are AMAZING! Love Love Love
That is just so cool! I am going to try this!
I saw this on her site as well and wanted to give it a try. I went to my husbands closet, but none of his ties were 100% silk and I didn't want to make a trip just for ties I was going to cut up, LOL!
Yours turned out great!
I've seen these all over the web this season and found an etsy shop that sells the whole sha-bang-enough squares of 100% silk ties, white fabric to cover and twisties- plus instructions- to do 2-3 sets of 16 eggs!! for just $12.50!!!!!!
http://www.etsy.com/shop/thejunebride
And free shipping. just wanted to pass that along in case anyone else wants to give it a go- we are running out thrifting time.. 🙂
Wow!! These are gorgeous!! I just found your blog, I love it!
he he he…nicole, I'm leaving that comment alone. swear it's like 6th grade in my head sometimes–lol.
Beth, it really didn't take that long. Took longer to take all the photos.
Those are very pretty but I would not be able to blow an egg.
Uh, that would be "recognizable SHAPE", not "egg". LOL
Long day…
WOW Deb! I'm very impressed with your eggs AND the amount of ambition you must've had just to do that! Kudos to you!
This year, I'm going to try using stickers as masks… you put a shaped sticker on the hard-boiled egg, like a letter or some other really recognizable egg. Then you dip it, and when it's completely dry, remove the sticker.