Bathroom Shower Remodel – Bathroom Makeover Part 1
This post and its photos may contain affiliate links, view our disclosure policy.

I won’t even tell you how many years ago we purchased our home. Let’s just say it’s been a while and leave it at that. At the time, the first thing I wanted done was a bathroom remodel. The bathroom SCREAMED 1970’s and I wasn’t a fan. Needless to say, life happened, as it often does, and the bathroom makeover never happened. Instead, we were busy raising kids and trying to make ends meet. Fast forward many years later and the bathroom makeover is finally happening.
HOW IT ALL BEGAN…
It all started with an email from Delta Faucet asking if I’d be interested in installing and reviewing their new UPstile Shower/Tub Surround system. Talk about divine intervention. Yes, yes I would be interested in installing and reviewing it.
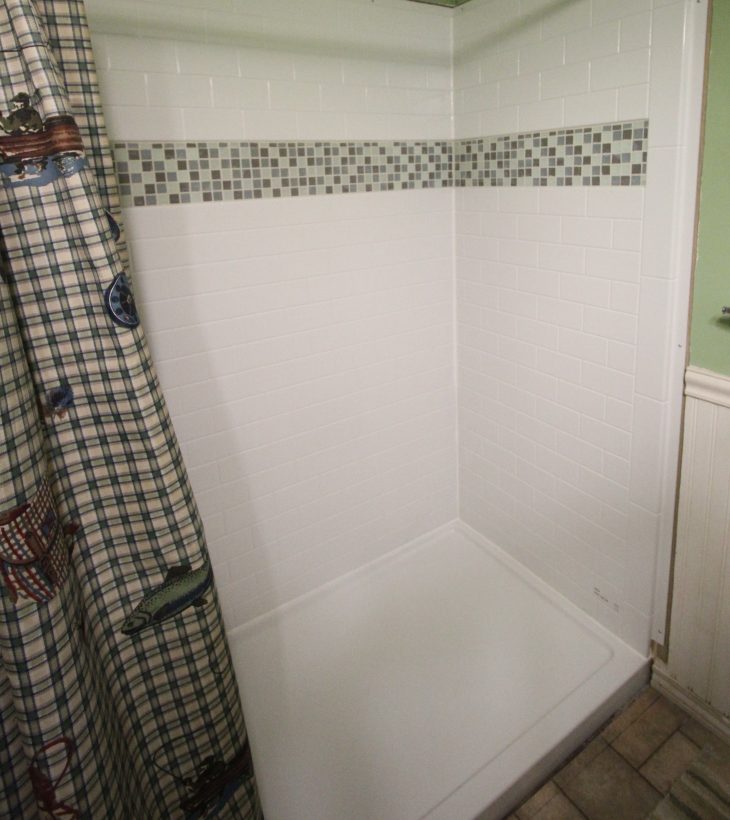
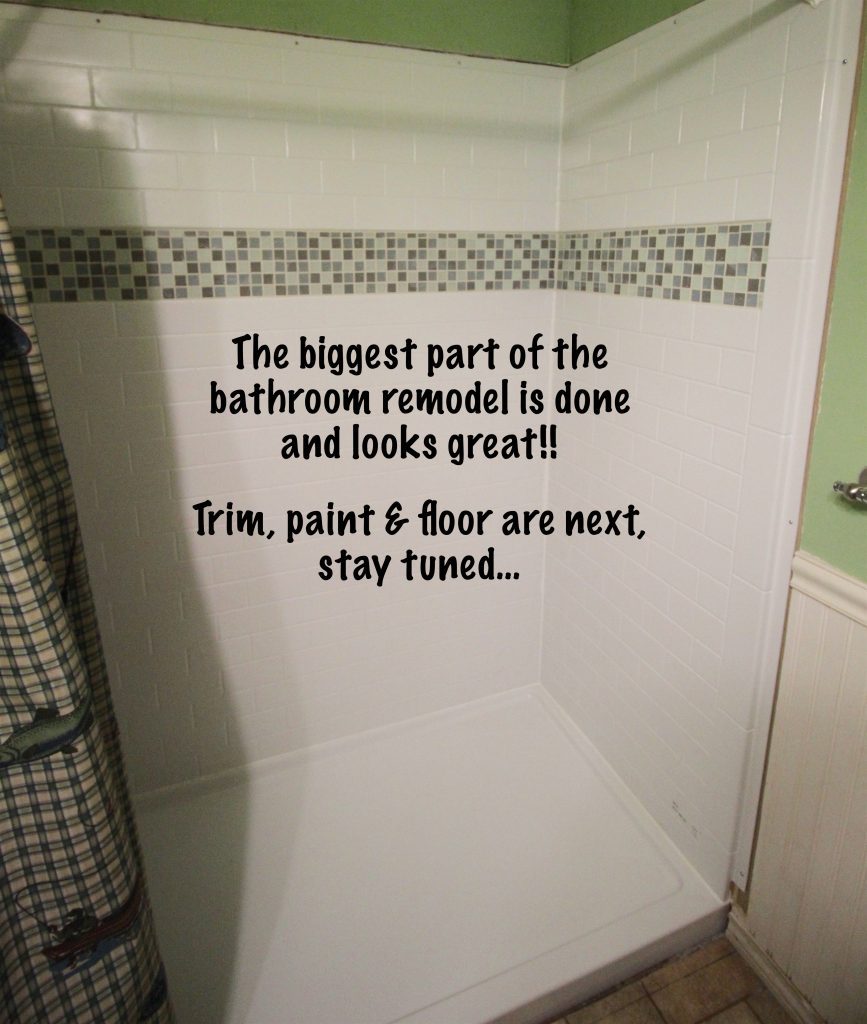
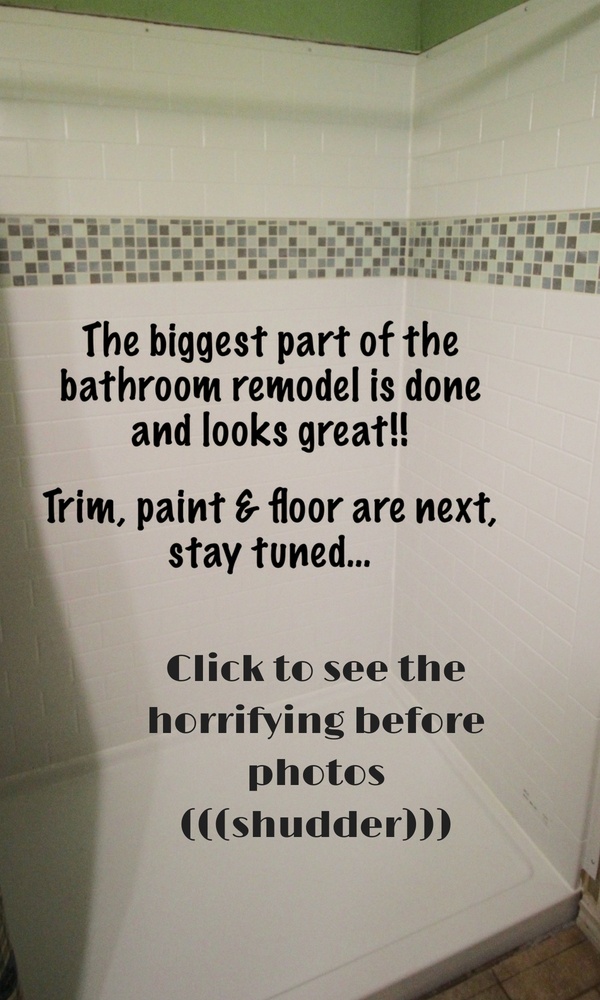
Delta’s UPstile system puts the final design in your hands. It is created so that you can personalize the wall system in your shower in a quick and simple way. The main feature is a channel to inlay the tile of your choice, give you the opportunity to have a custom look at a much better price point.
Alan picked out our tile. I simply said, “Bring back something that reminds you of the beach!” He returned with the perfect tile which I installed while Alan took a little break from the project. I don’t like all home projects [(shudder)painting(shudder)], but I LOVE tiling. Maybe because I love puzzles and love fitting things together to end with a great design.
I love how the entire project is coming together. The shower remodel is step 1 in our bathroom makeover project and it looks fantastic. Read on to see how we made it happen.
MOTIVATION–HOW EVERY PROJECT BEGINS
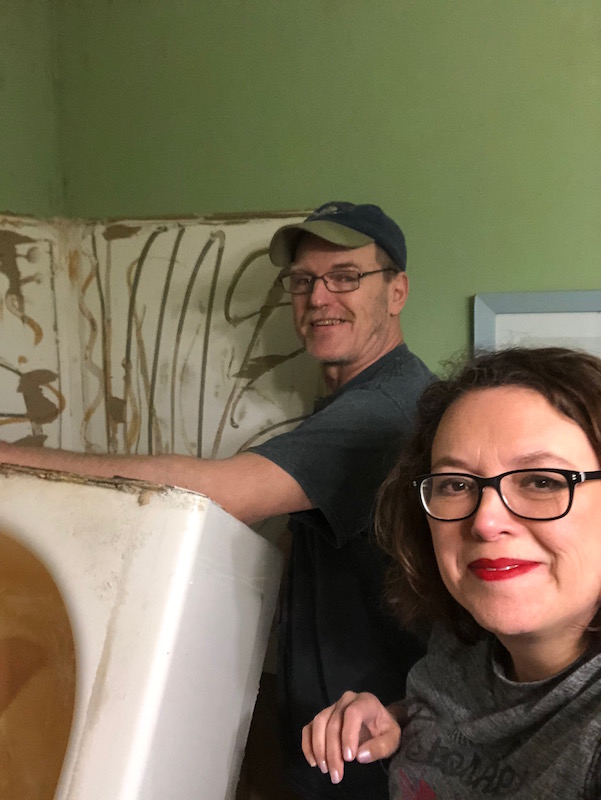
I finally found a weekend at home to make the switch from the old tub and surround to new shower and surround. Not that I’m really needed for the work, but Alan isn’t really motivated to work on these projects when I’m gone…sigh. You want to see what your marriage or relationship is made of? Start a home renovation project. There has been some bickering and arguing about how things should be done on this project, but I keep reminding myself to keep the eyes on the prize. That usually helps as does walking away and letting the person doing the actual labor do it how they want. Eh, it’s what keeps our relationship healthy LOL.
A BATHROOM SHOWER REMODEL BEGINS
I guess I should mention that we probably have one of the smallest bathrooms ever. The floor space from wall to wall comes in at just 5’x8′ and it is the only bathroom in our house. (YIKES!) That means once the new tub was yanked out there would be no showers until the new base and surround was installed.
Some people tell us that removing the tub and installing a shower only reduces the value of our home. Yeah, we’ve lived here almost 25 years. I spent the first 15 years BEGGING Alan for us to move. That never happened so I’m resigned to living here until we die or go to a retirement home. As far as I’m concerned we may as well have exactly what we want in our house since we dont have to worry about selling it for MANY MANY years to come 🙂
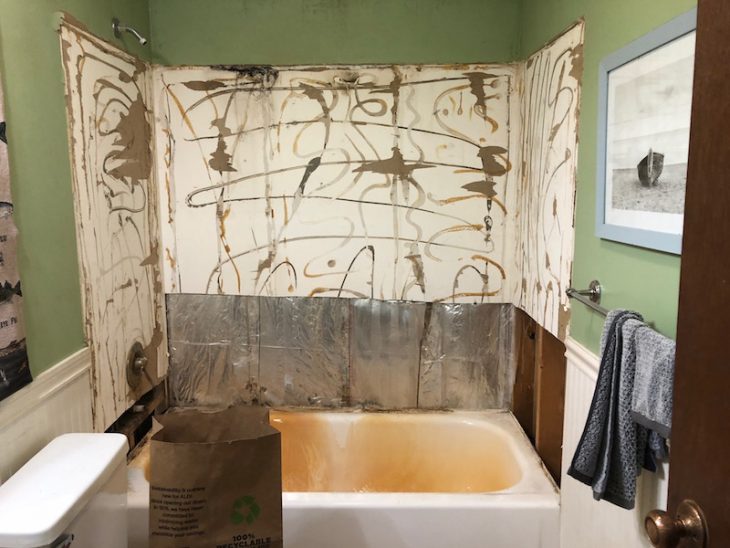
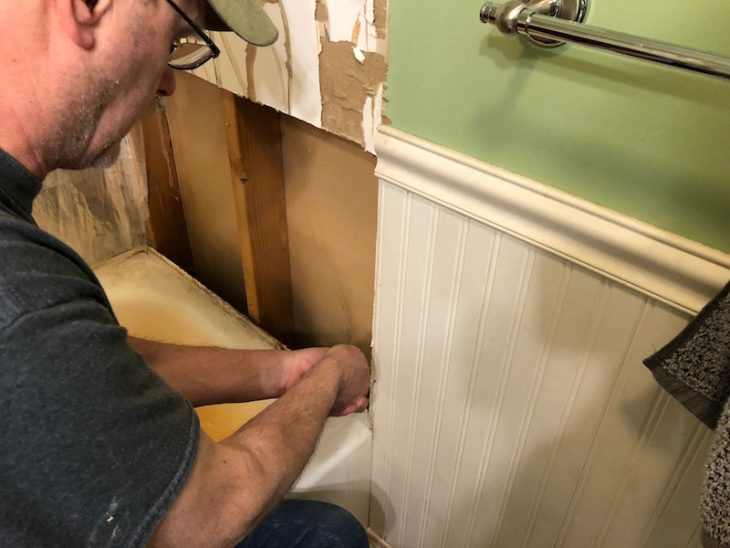
REMOVE THE OLD TUB
The old surround was easy to remove. It had been glued on decades before so it simply peeled off. The tub required some cutting out of the drywall to give us room to lift it up and out. Thankfully, Alan has some muscle and was able to yank it out of the space.
Once the old was out, the challenging part was about to begin. Because our old tub was 30″ and the new shower base was 32″ we (I use “we” loosely, it was mostly Alan, I just fetch tools and clean up) had to cut 2″ back of the floor and cut out the remaining existing drywall since the new enclosure mounts directly to the wall studs.
HOW HARD IS IT TO INSTALL THE NEW?
If you have some basic handyman knowledge (framing, plumbing, finishing) and access to YouTube for “How To” video references I think you’ll be ok. However, if you’re not very handy with home repairs I HIGHLY recommend you hire this job out. This is not a beginner’s handyman project. For us, we’ve been doing minor and major repairs around the house for a while now so I felt confident in our skills and research abilities that we could handle it.
Although, I may have overstretched our skill set a bit. We started on this project Friday morning. It is now Thursday afternoon and it’s still not complete and sponge baths are getting old. Fortunately, I’m leaving to travel for 10 days which means hotels with useable showers (YAY!) That being said, we are very close to wrapping up this project, but I think it will be at least another day, maybe two before it’s usable.
_
WHAT THE DIY INSTALL INVOLVES
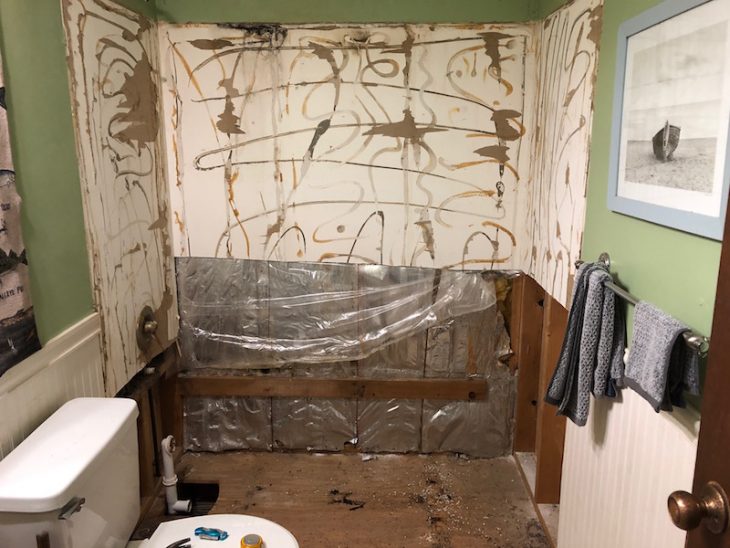
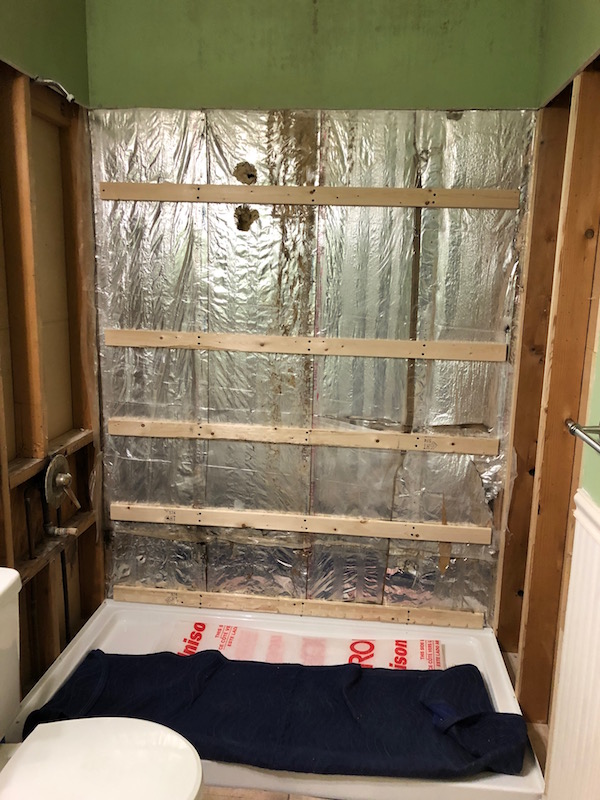
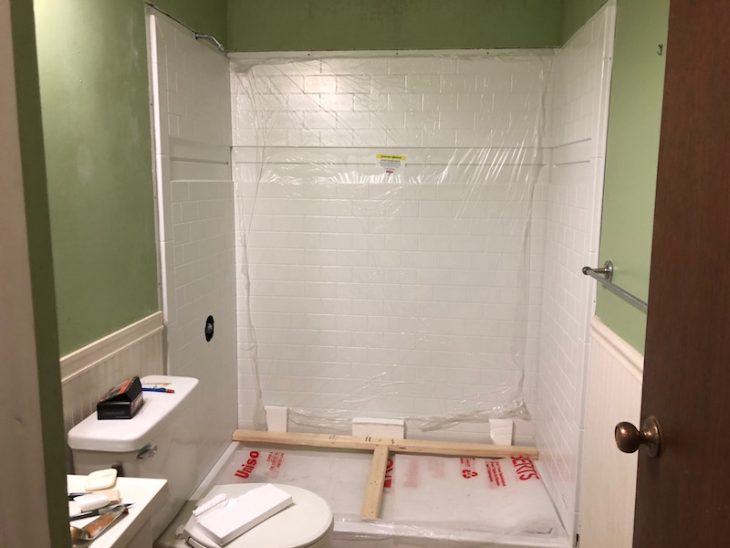
After the old tub and surround was out it was time to prep the area for the new system. This included cutting out the drywall (thank goodness because I found some mold hiding back there) and adding slat boards to the studs to give the new surround something to adhere to. We also checked to make sure the shower base was level.
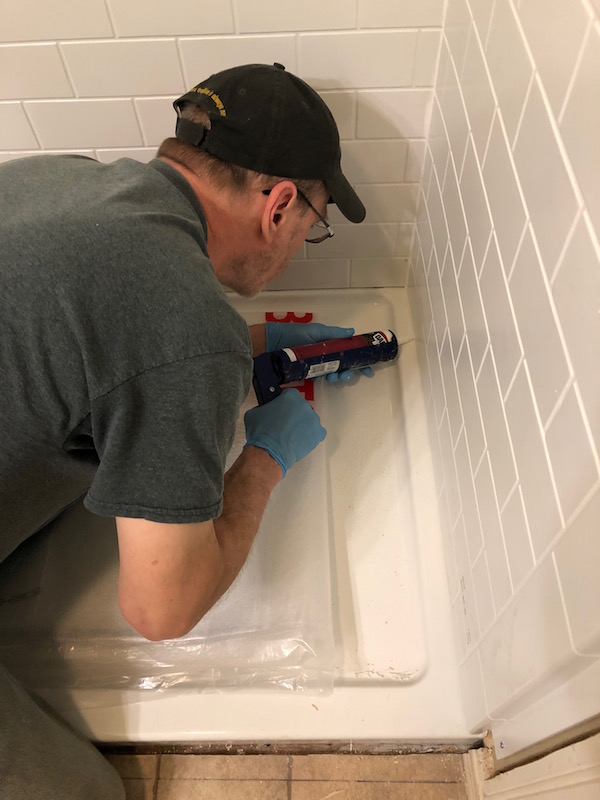
After the base is installed, the panels have adhered to the wall and then a brace is placed at the base of the tub to securely hold everything in place for 24 hours. Next, caulking all the seams to make it a watertight shower and another 24-hour wait. Then add tile to the surround and wait another 24 hours. See where I’m going here. In my mind, we brace, caulk and tile, wait 24 hours and we’re good to go. In Alan’s mind, you take 3 days and do each of those steps separately. (Marriage Challenge #1,572–I really believe patience and picking your battles are key to marriage, but there comes a point 🙂 See why I mentioned hiring it out?
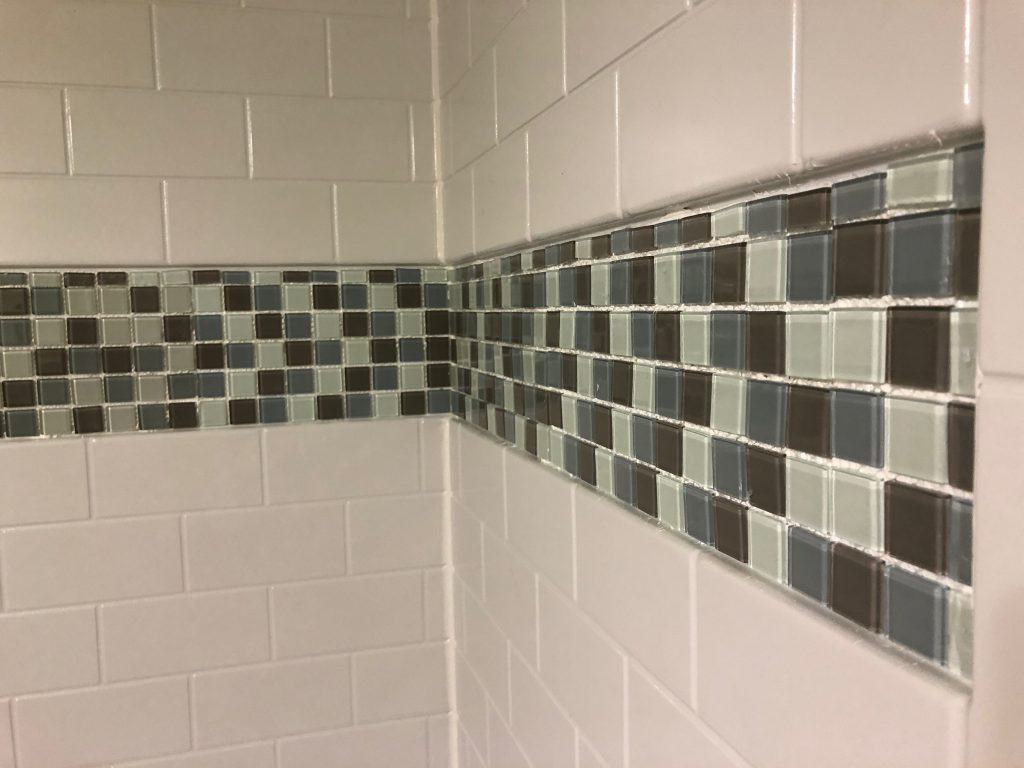
I love how customizable Delta’s UpStile Surround is and how it lets me fit the surround to my decor and color scheme. I have a huge love for the ocean so I knew we would go with beachy colors.
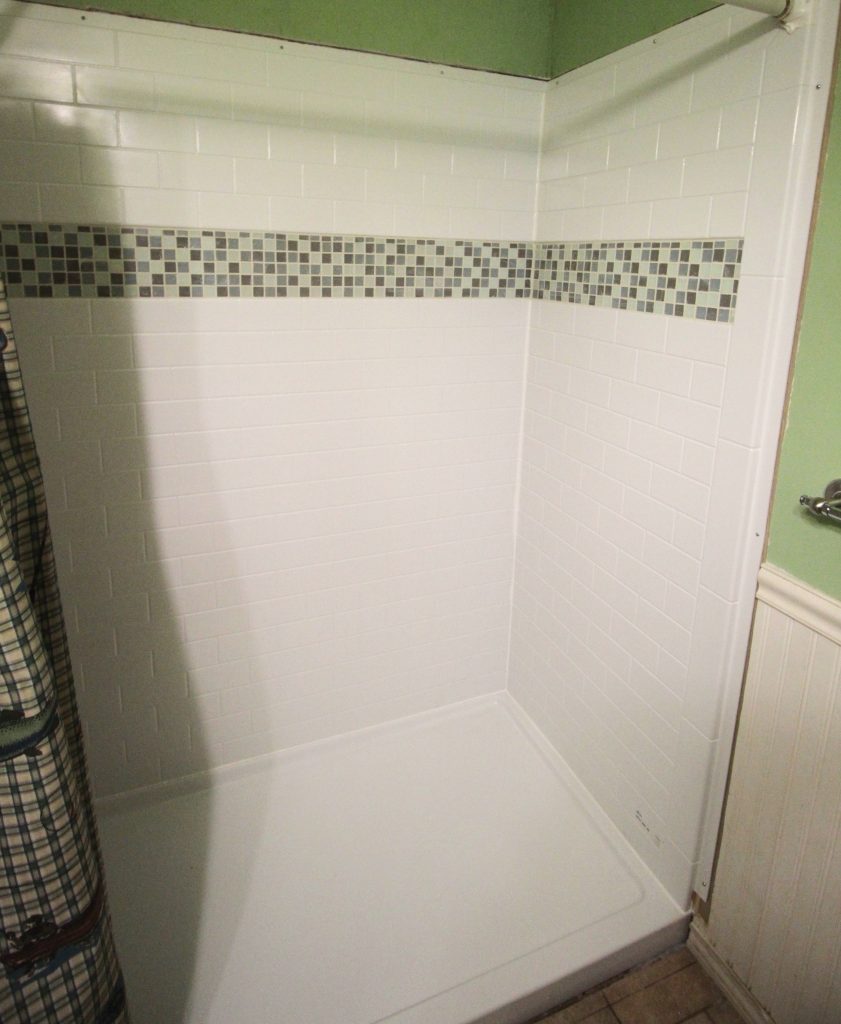
FINALLY, the bathroom shower remodel is done! Now that the big project is out of the way we are going to paint, install new light fixtures and add some finishing touches. Stay tuned for that post probably by the end of June 😉
What The Bathroom Shower Remodel Cost
- Delta Upstile Surround is available at Home Depot
- Delta UPstile 32 in. x 60 in. x 74 in. 3-Piece Direct-to-Stud Alcove Shower Surround with Customizable Design in White. $510
- Delta Classic 400 32 in. x 60 in. Single Threshold Right Drain Shower Base in High Gloss White. $189
- Additional supplies (tile, plumbing, etc) approximately $200.
- Total: $899 + counseling required from surviving the process…….kidding, just kidding 🙂
Want to update more things in your home? Check out our Ghost Bed mattress review for how we made our bedroom even more welcoming!