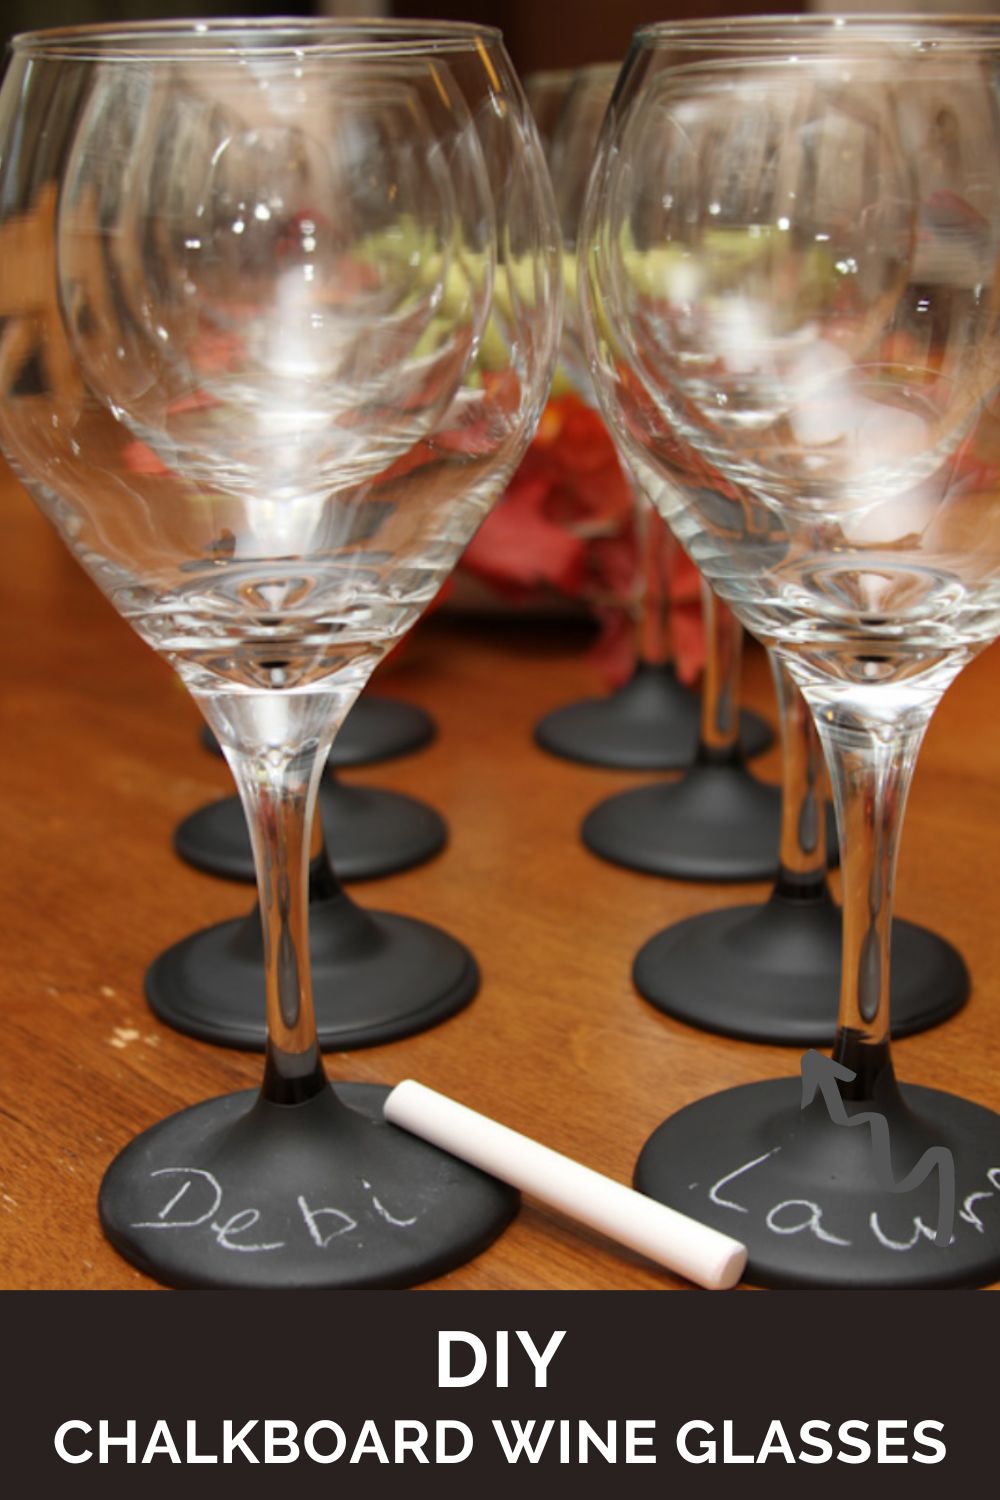
Chalkboard Wine Glasses Tutorial
This post and its photos may contain affiliate links, view our disclosure policy.
I was browsing for party ideas when I stumbled across wine glasses that had chalkboard stem and bases. I fell in love with them, but they were quite expensive and I have other habits (ie: travel) that require my money.
I’m crafty enough and I figured they couldn’t be too hard to make so I bought supplies and gave it a go.
The truth is, this is an easy DIY project and I saved a lot of money by doing it myself.
I put together this chalkboard wine glasses tutorial so that you can make your own chalkboard wine glasses as well.
To start, you’ll need 4-8 wine glasses and some chalkboard paint! That’s it.

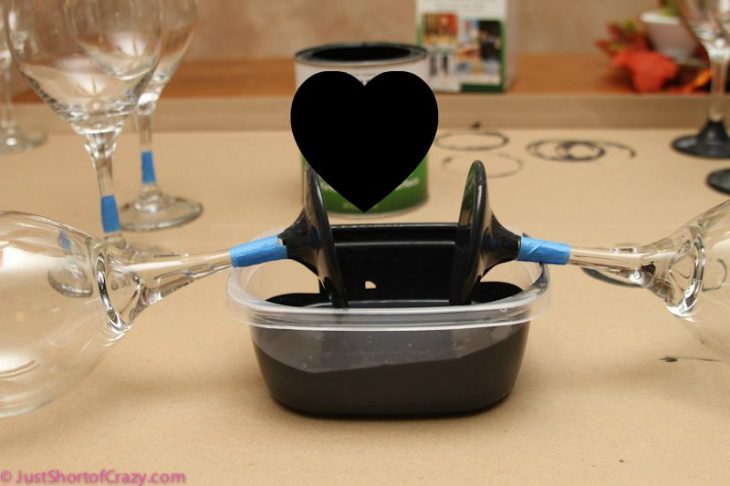
Before doing anything else be sure to lay out a piece of heavy cardboard on the work surface (very important).
If the wine glass base is small enough you can dip the glass directly into the paint tin.
However, my glasses had a big base so the paint had to be poured into a different container….easy enough.
When you are ready, gently dip the bottom of the glass into the paint.
The paint will be thick on the glass. Carefully wipe the bottom of the glass across the lip of the paint container to help remove the excess.

Figuring out how to let these dry was the challenge. After a couple trial and errors I found a solution.
First attempt: I let enough excess paint drip off my glass, I thought, and then held it up for what seemed like forever. Then, I turned it over to let it dry upside down.
FAIL!
The paint dripped down the stem of the glass and I quickly had to work to remove that paint. Emma thought putting paint tape around the glass stems would help.
Life is all about trial and error and I figured this would be a good lesson for her. She put painters tape around the remaining glasses.
We dipped a couple and set them on their sides on the container to let them “dry” a bit. We moved them to the cardboard and set them upside down.
Once again, the paint dripped down them stem.

So my solution was to take some parchment paper and place on the cardboard. Then just set the glass upright on the parchment.
After about 20 minutes I moved the glass to another area so that it didn’t dry with the excess paint attached to it.
It worked like charm and I ended up with 8 lovely wine glasses for my party.

These really were very easy to make and if you know of a better drying process I’d love to hear it. My guests ended up designing their own glasses.
They were very creative with their designs, unlike my boring name only design above. These were a hit at the party and inexpensive to make which left money in my party budget. I love it when that happens!
Thanks to reader Amanda Bakker for this great tip:
“When I dipped one, I would hold it over the paint can to drip, then took a small paintbrush and wiped much of the paint off the bottom of the glass. I set them each on wax paper to start the drying process. When paint would run down and pool around the glass on the wax paper, I would pick it up by the top, and wipe/spin it on a paper towel, focusing on the edges, then set it back down in a new spot. I only had to do this 2-3 times per glass, til it had dripped enough that it didn’t run off anymore, and then they dried like that for about an hour, then I inverted them and they dried the rest of the way. It seems to have worked well, they turned out super cute!
Thanks to reader Alyssa from Love, Live and the Little Things:
Deb I absolutely fell in love with these glasses. My mom showed me the idea a few weeks before Christmas, so I decided to try them out. I saw your post about using the can of Rustoleum, but when I went to search for the paint I found spray paint instead, and it worked like a CHARM. No messy drips! I taped off the stem about halfway up, covered the rest of the wine glass with paper towels, and sprayed the bottom. It took a couple coats but it dried super quick and I just set them upside down to dry. I hope this helps you and your readers!
These are not dishwasher safe. Please hand wash the globes and gently wipe the stem/base, if needed, with a damp cloth.
Pin Chalkboard Wine Glasses Tutorial to Pinterest