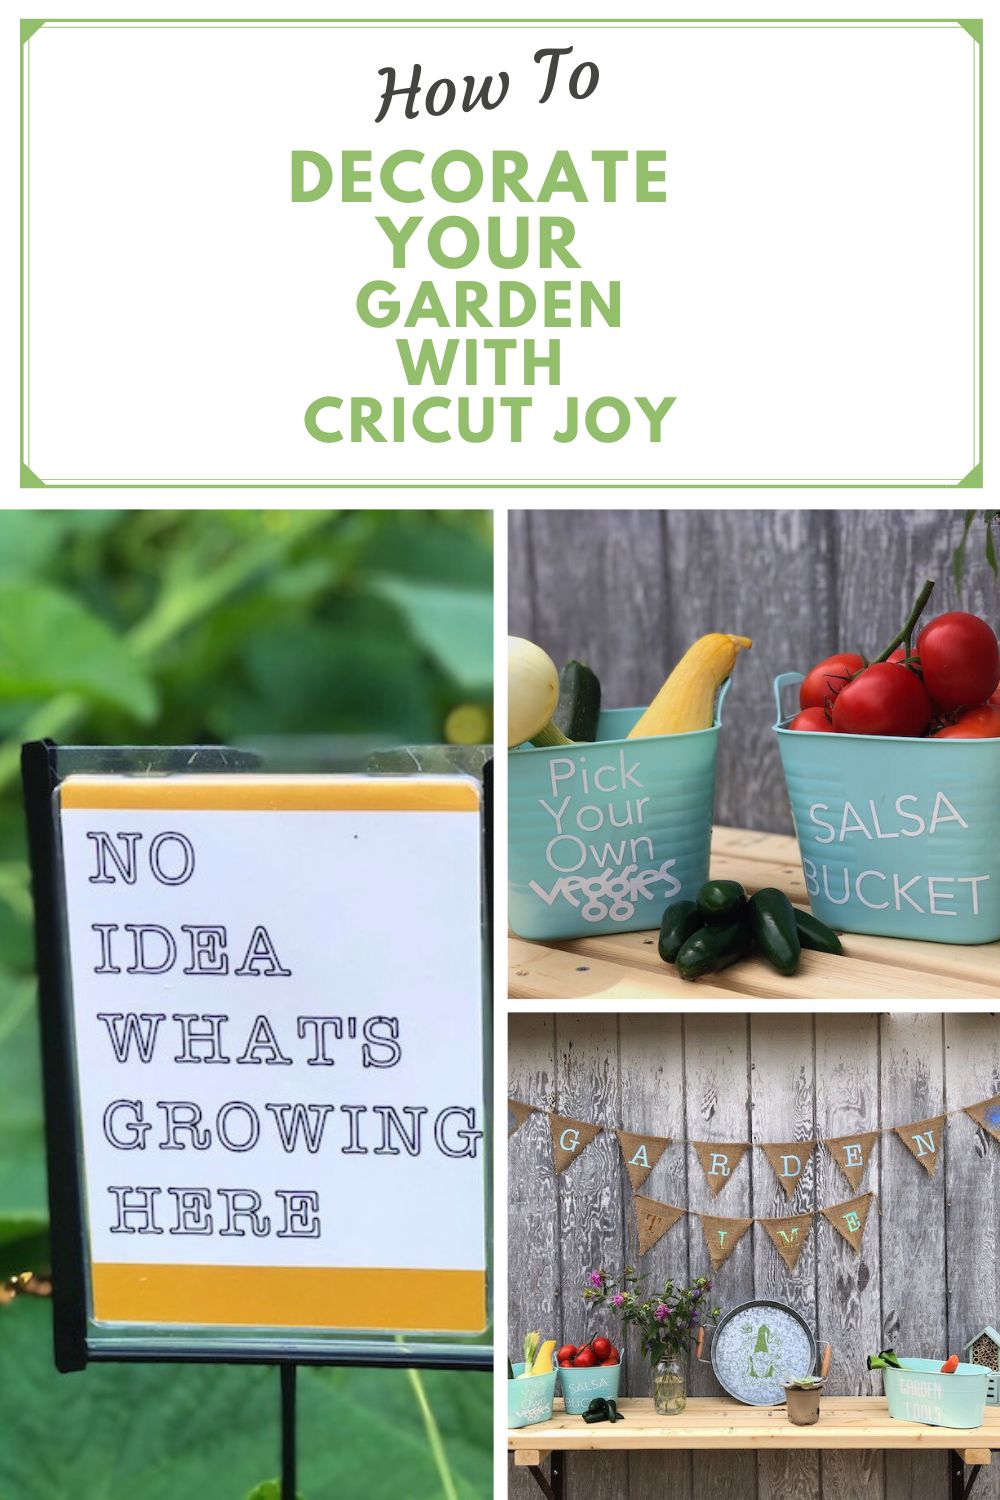
How To Decorate Your Garden with Cricut Joy
This post and its photos may contain affiliate links, view our disclosure policy.
It’s amazing the new ways I find to stay busy now that I’m not traveling. This spring we planted a whole lot of vegetables in multiple gardens we have spread across the yard.
Of course, planting was good enough. I had to take it a step further and add some decor to the greens. If you want to know how to decorate your garden with Cricut Joy keep on scrolling!
When I started thinking about how I wanted to decorate the garden the first thing I knew I wanted was a potting bench or table.
POTTING BENCH DIY-ish
Of course, by the time I went to order one everything was sold out or seriously back-ordered.
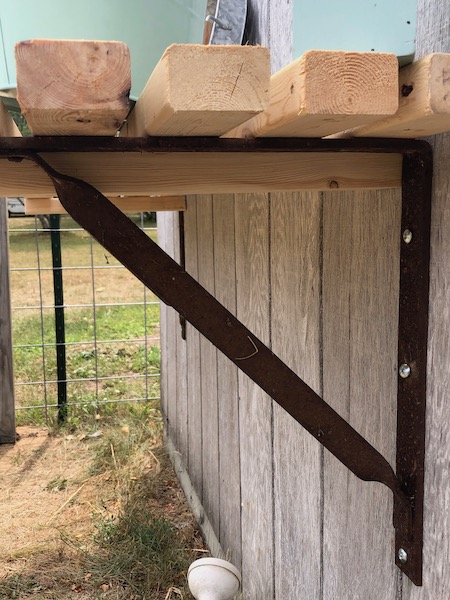
Alan to the rescue with his mad DIY skills. He found some brackets in the garage, bought some wood, and put together an awesome potting bench for me.
So he basically took the pieces of wood and laid they out horizontally and then added a short piece vertically to hold it all together and then screwed it down to the brackets.
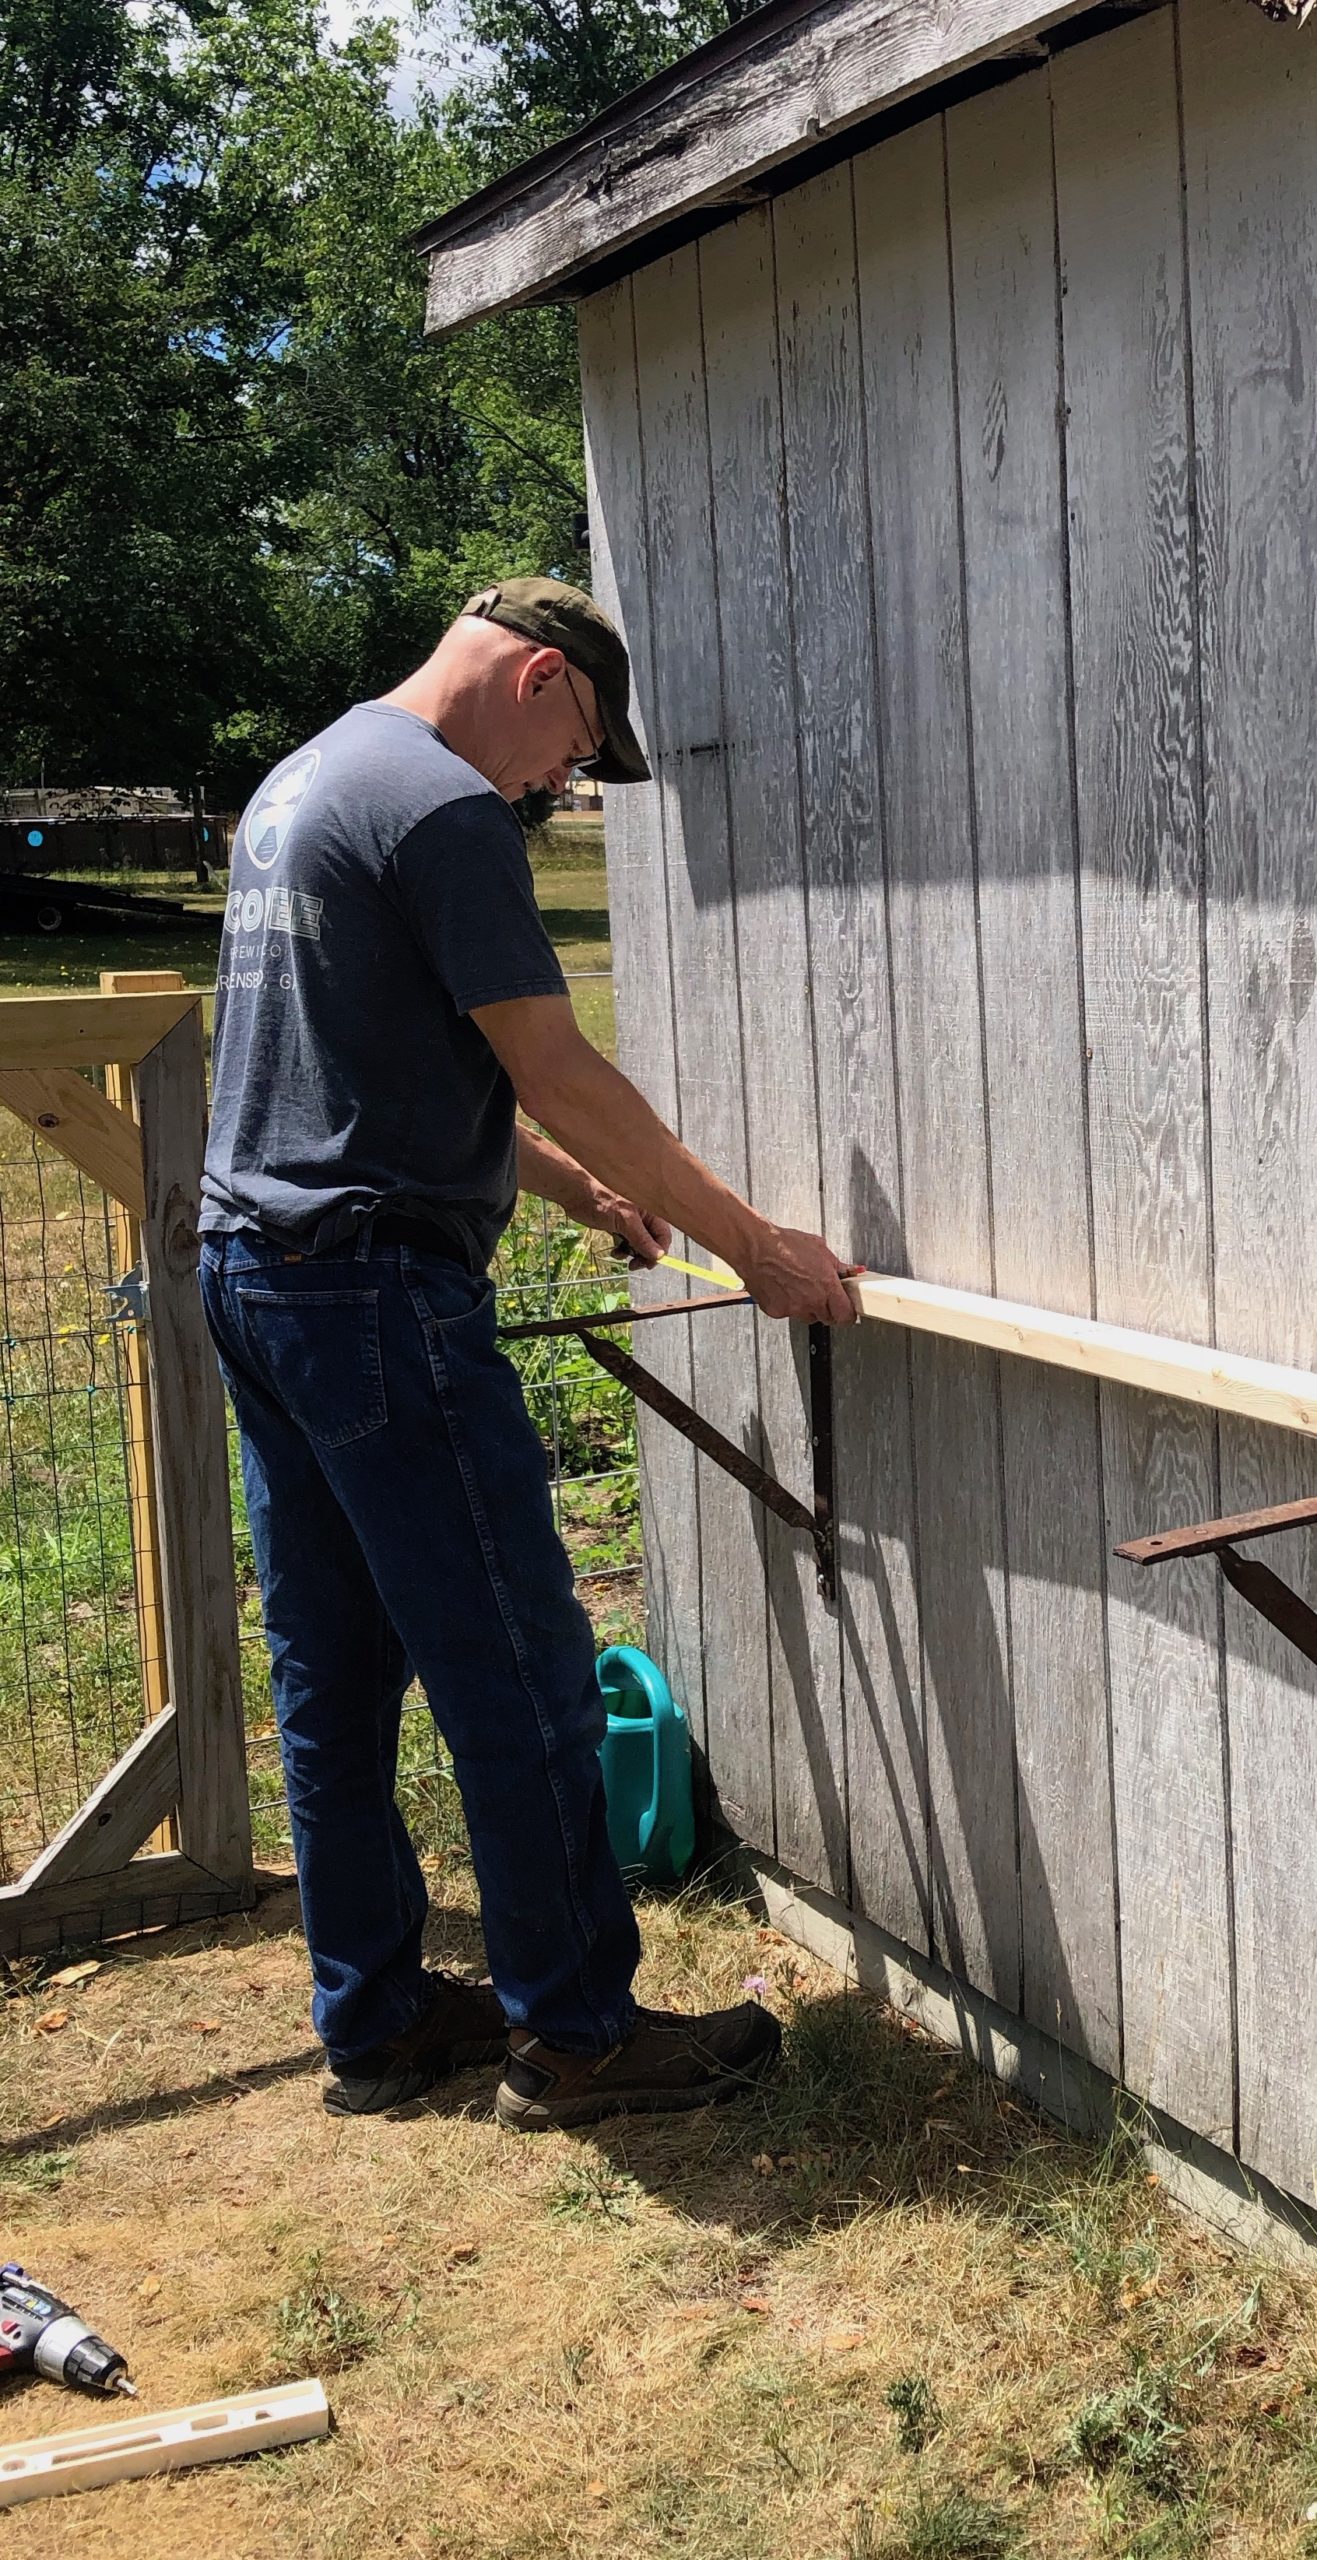
He said after it weathers a bit we’ll stain it, but I’m happy with how it looks now.
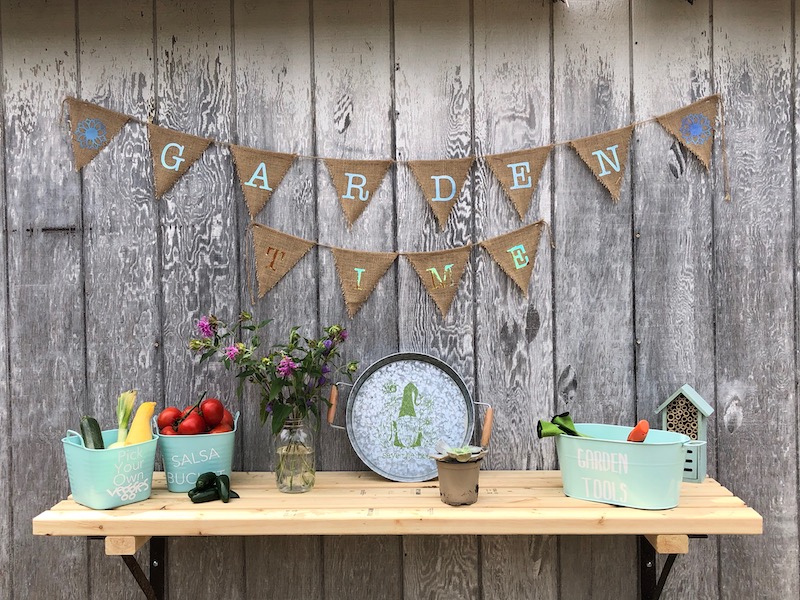
Well, if there’s a potting table there has to be a cute flag banner above it. Then I’ll need buckets to hold my tools and veggies when I pick them.
You see what’s happening here, right? One thing leads to another before you know it you’ve spent a week making fun decor for the garden.
Before We Begin To Decorate The Garden with Cricut Joy
A few notes before we jump in.
- I’m assuming that most people have a basic knowledge of Cricut Design Space. If you need help Cricut.com has a lot of resources.
- Each of these projects should easily be done in 15 minutes or less. That’s the great thing about the Cricut Joy it helps me quickly get a project done.
- Cricut Access Standard is well worth the investment for the fonts and images, in my opinion. All the projects here use the available Cricut fonts.
- Purchase a Cricut Joy here.
4 Ways To Decorate Your Garden with Cricut Joy+ A Bonus
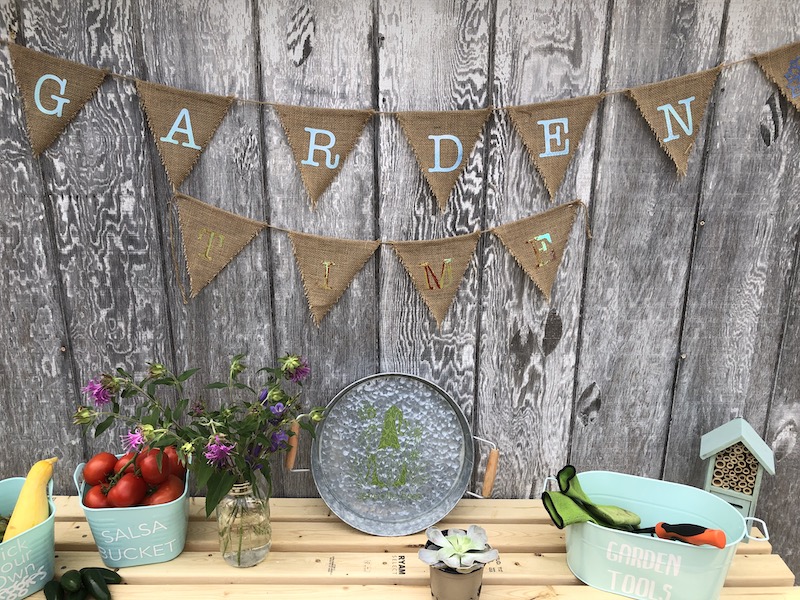
#1 – Garden Time Banner Flag
This is one of my favorite projects. I love how it turned out. The hardest part was deciding what I wanted it to say. The best part is you can print whatever you’d like to add to your garden.
Tools Needed:
Cricut Joy
Weeding Tool
Mini Easy Press or Easy Press

Materials Needed:
Cricut Joy Smart Iron On
Burlap Banner
Scissors

Directions:
Open Design Space (either on your computer or the Cricut Joy app)
Click “New”
Click “Text”
Type Garden Time, select font and size (depending on your banner size)
Pick a Cricut Smart Iron-On in color of your choice.
Click “Make It” and follow the step by step instructions.
Once the letters have been cut out, use your weeding tool to weed the letters.
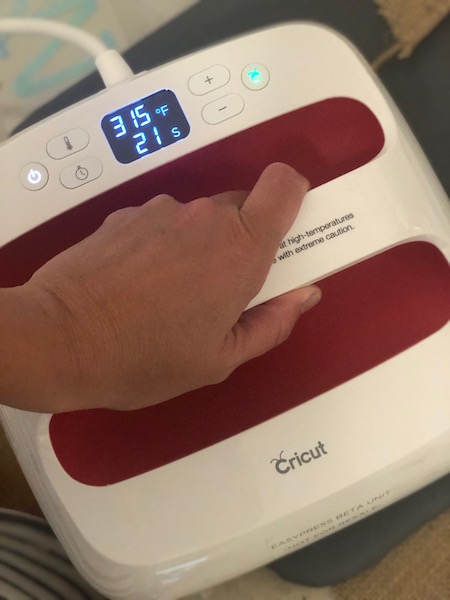
Use the application instructions found here on how to apply the Smart Iron On to the banner.
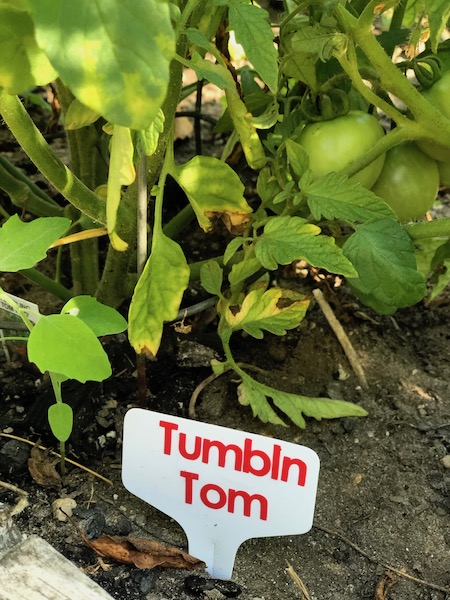
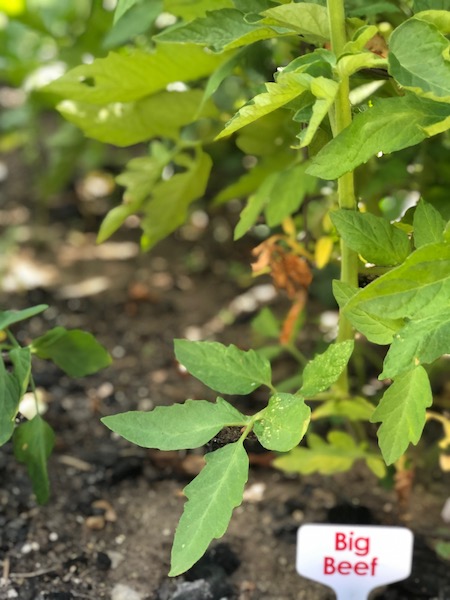
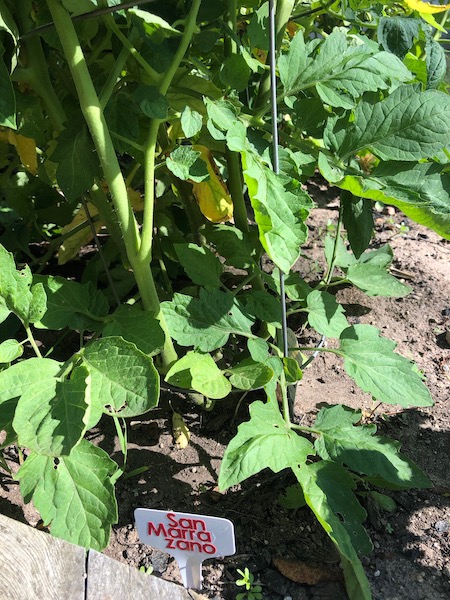
#2 – Vegetable Marker Tags
These are great for marking your plants. I highly recommend doing this as soon as you plant them. You’ll see why this is a good idea a little later. So much fun and if you have the time you can create little veggie outlines to go on the markers even puny phrases.
Tools Needed:
Cricut Joy
Weeding Tool
Materials Needed:
Cricut Joy Smart Permanent Vinyl
Transfer Tape
Blank Garden Markers
Directions:
Follow the design and cut instructions above. After you have the letters cut out use the transfer tape to move the letters over to the garden markers. Done.
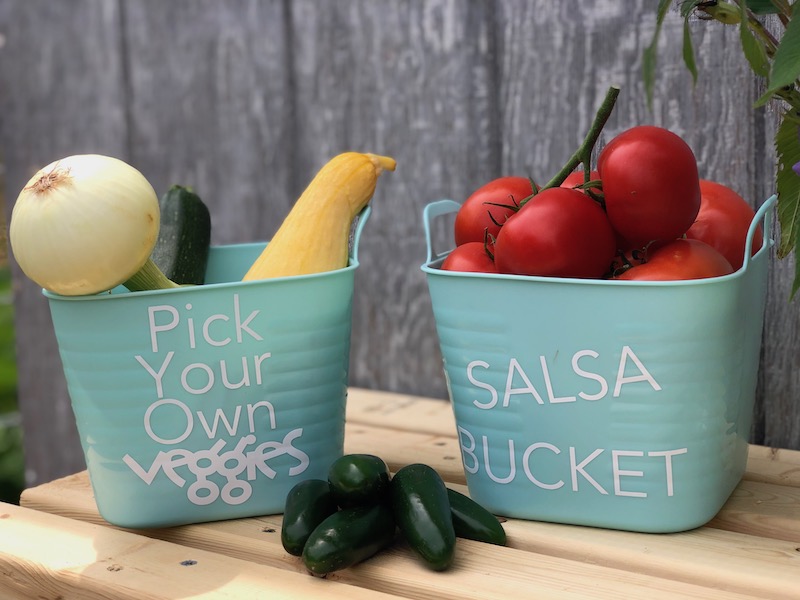
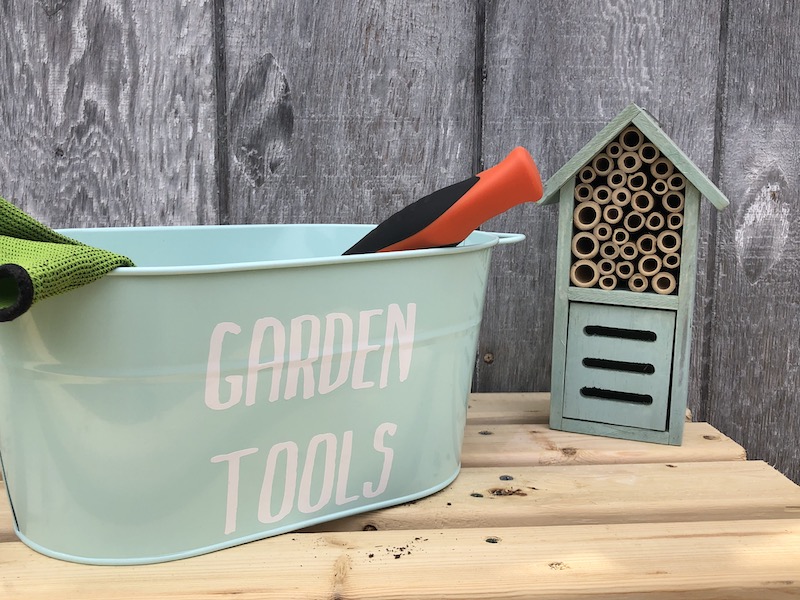
#3 – Garden Buckets
I have really high hopes of having a very productive garden this year so veggie buckets were a must! I picked up some thick plastic buckets at a local store and then added my own phrases.
This is a really quick project and can be done in under 15 minutes.
Tools Needed:
Cricut Joy
Weeding Tool
Materials Needed:
Cricut Joy Smart Permanent Vinyl
Buckets (plastic and/or metal)
Garden Sign blanks
Cardstock
Directions:
Follow the design and cut instructions under the Garden Time Banner Flag. After you have the letters cut out use the transfer tape to move the letters over to the containers.
Note: I let vinyl adhere for a couple days before using them or moving the items outside.
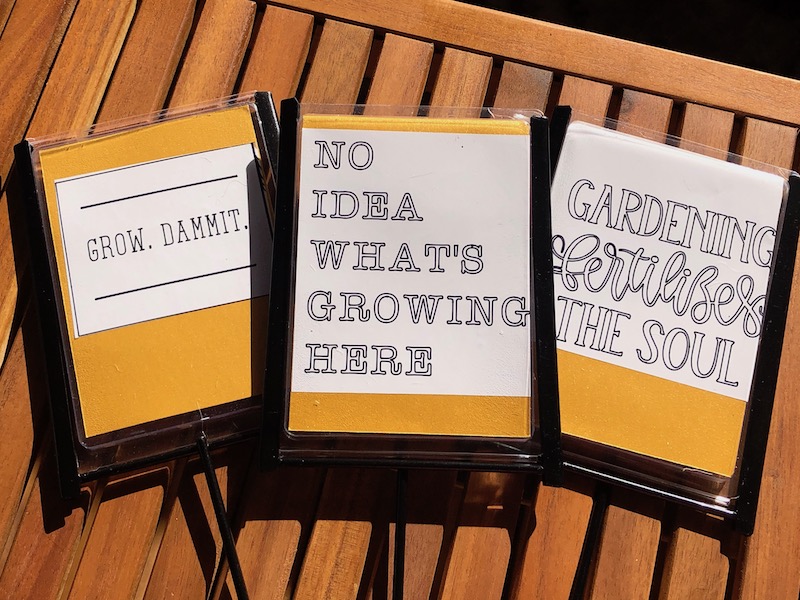
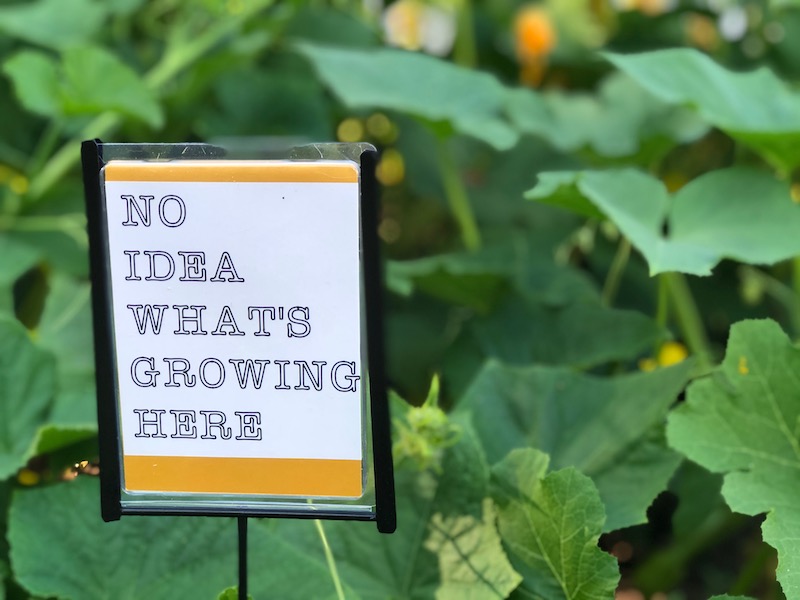
#4 – Fun Garden Signs
I was at a local store and saw these garden signs on clearance. They are meant to hold a seed packet to mark what plants are growing, but I just knew they would be better served as fun garden signs.
Tools Needed:
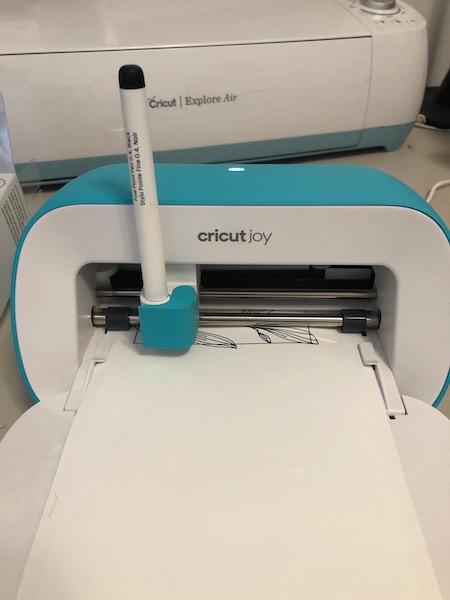
Cricut Joy
Cricut Joy Fine Point Marker
Materials Needed:
Cricut Joy Smart Label Writable Vinyl
Cardstock
Garden sign holders
Directions:
Follow the design and cut instructions under the Garden Time Banner Flag above BUT instead of cut change the setting to draw under “linetype”.
Cut a piece of cardstock to the size of the sign. After the sign is drawn, peel and stick the vinyl to the cardstock. Insert in the sign holder and place in the garden.
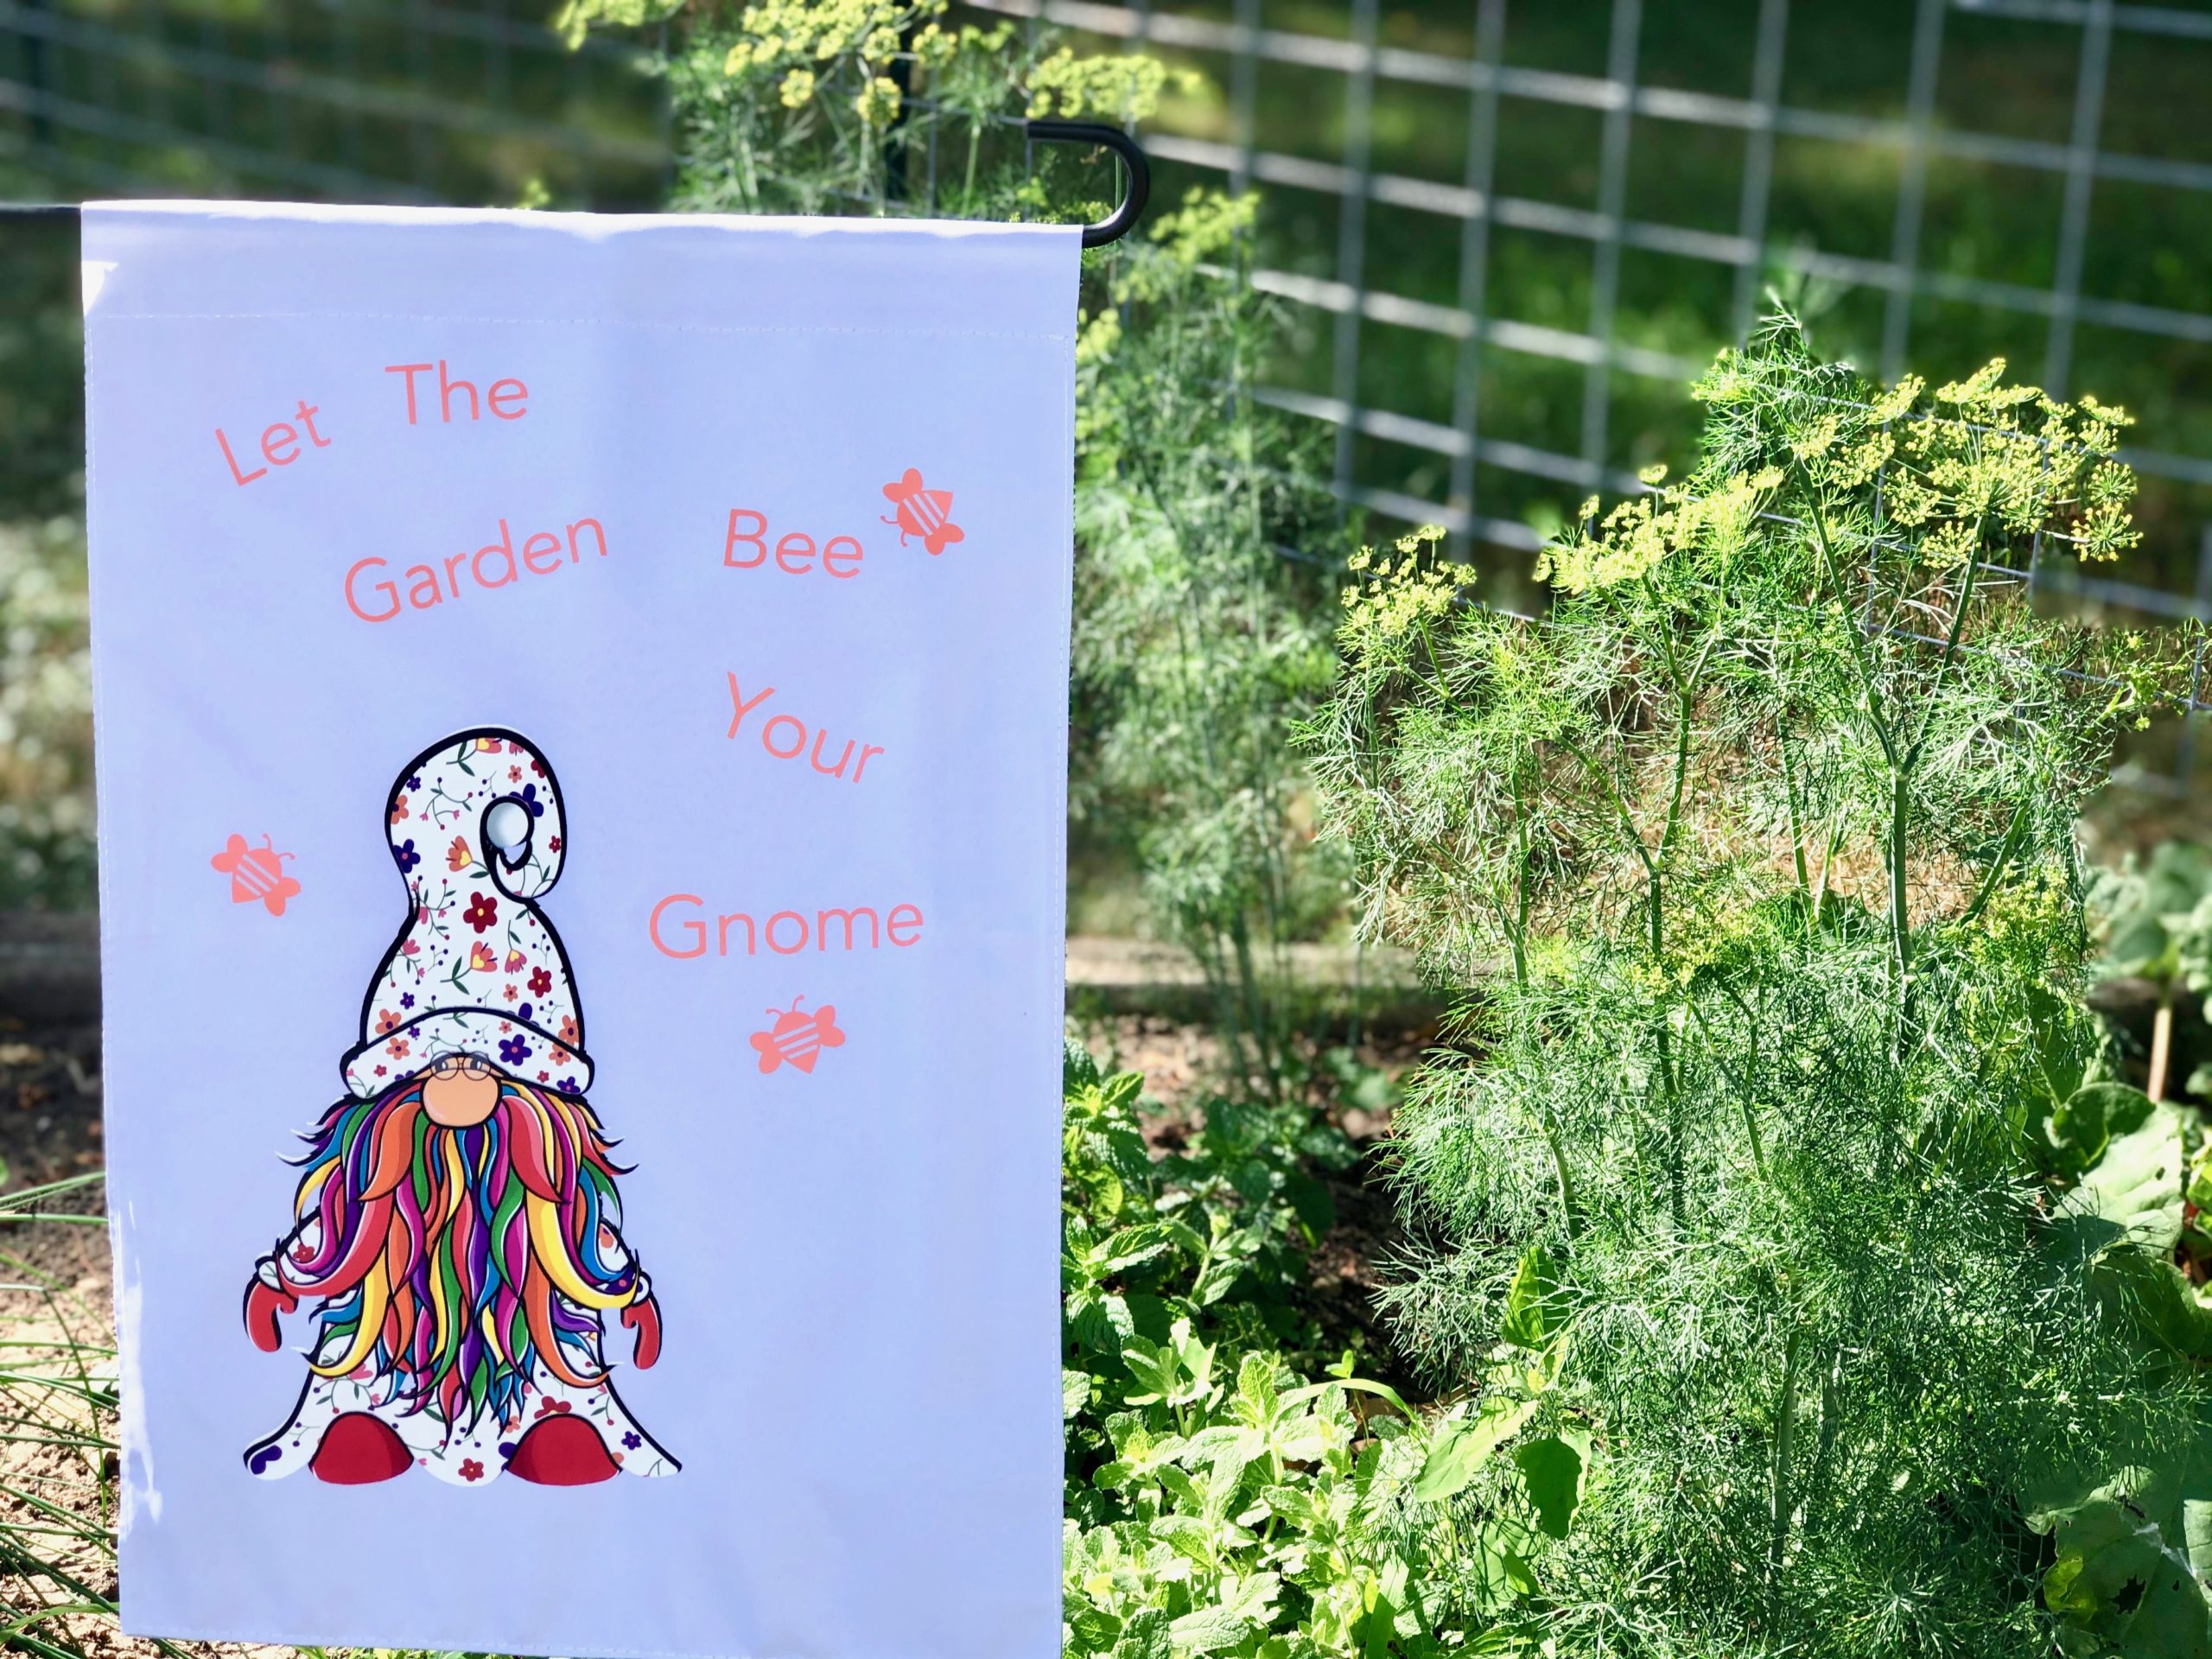
BONUS PROJECT: Garden Flag
This is a bonus project because it takes a Cricut Explore as well as a Cricut Joy, but it was so much fun to make. The flag was my very first attempt the Cricut Explore’s ability to do print and cut and it was AMAZING!!
I LOVE gnomes so being able to print out this colorful guy on my printer and then having the Cricut cut him out completely made my day!
If you’re not familiar with print and cut you’ll want to do some research and watch a video, but it is easy to catch on.
One thing I wish I would have done differently was to make my words a lot bigger, but overall I’m really happy with how it turned out.
Tools Needed:
Cricut Explore
Cricut Joy
InkJet Printer
Weeding Tool
Easy Press
Materials Needed:
Cricut Smart Joy Iron-On, the color of your choice
Transfer Sheet for Dark Fabric
Blank Garden Flag and Stand
Directions:
Use print and cut to create an image you want to adhere to your flag. On the Cricut Joy cut out the words you want to go with your image and then weed them to remove any unnecessary pieces.
Adhere both to the flag and place in the garden.
Honestly, after I figured out the print and cut system this didn’t take long to complete.
Be sure to pin this post and share it with your friends. These are really simple ways to decorate your garden.
If I can get another project to work out (the first attempt was a HUGE fail) I’ll be sharing how to turn a pizza pan into a cute sign for your front door.
More Cricut DIY:
DIY Cricut Joy Ideas For Tea Towels, Glasses & Mugs
Cricut Ideas for the Air and Joy
DIY Dogwarts Dog Bandana with the Cricut EasyPress Mini
Pin How To Decorate Your Garden With The Cricut Joy